Updated 2013-06-17: Added information about bindings when hosting multiple sites
---
Today I had to install a renewed certificate for a HTTPS web server. Here are the steps I followed.
Create (or reauthenticate) your account
- go to https://www.startssl.com/ and authenticate (or sign-up or use the express lane button).
- This process involves entering a authentication code send to your e-mail address.
- Follow the procedure, everything is pretty straightforward. Don’t forget to backup your certificate which is installed in your browser. If you reinstall your pc, you will need this certificate to gain access to your account.
Do e-mail validations first
The first catch. If you want to create a certificate for another domain.
First do a “email address validation” in the validations wizard for the domain you will be creating a certificate for. If you want to create a certificate for domainxyz.com, then first do an email validation for postmaster, hostmaster or webmaster@domainxyz.com. For the .com TLD you might have other possibilities also.
If you did not validated this e-mail address, you won’t receive any verification codes on this e-mail address.
Create a certificate
If you follow all instructions on the “certificates wizard”. If you let startssl generate your private key, you should have a at least the following files at hand
- ssl.key (the encrypted private key)
- ssl.crt (the certificate or public key)
The SSL.crt could be used on a windows server, but that would be only the public key. For HTTPS you also need the private key, because you need to decrypt the encrypted data. So you will need to link the private key and the certificate together as we will describe in the next steps.
Decrypt private key
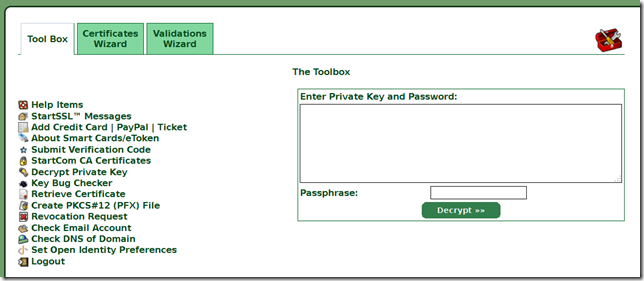
First go to the toolbox and click the “decrypt private key”.

Paste in the content of the ssl.key file, enter your password which you provided in the previous step.
You now have a DECRYPTED private key. Copy this decrypted key.
Create Certificate for IIS
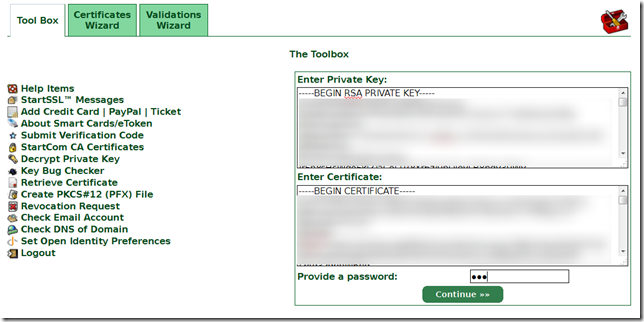
Now go to “Create PKCS#12” in the toolbox. Paste the decrypted key in the first box (private key). And paste the content of the ssl.crt file in the second box. Provide a new password to protect the file you will be creating.

Click continue.

Now download the PFX and use this file to install the certificate on your IIS 7.0/7.5 or higher.
Install the certificate
Open Inetmgr (Internet Information Services – IIS Manager) and open the “server certificates” on server level.

Click the “IMPORT” button and supply the PFX you just created (and uploaded?). You might not have the right file extension, but that is no problem. Just choose *.* as file type, select the file. Finish off with your password, before hitting return.
Redefine bindings of website
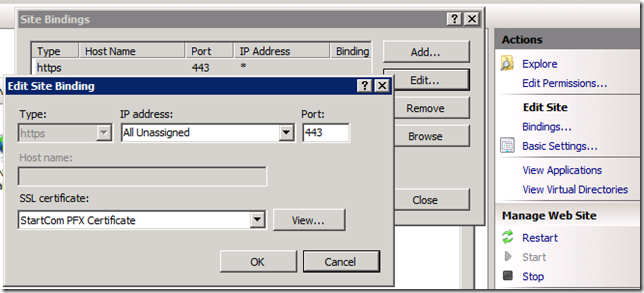
If you have only one HTTPS site running Go to your HTTPS site,
- click “Bindings”
- “Edit” the https (port 443) line
- choose the right SSL certificate
- hit “OK”,
- and click the “Close” button

Bindings when hosting multiple sites
If you have multiple sites running on your website, you might want to set the binding headers for HTTPS. This can be done using the command prompt (as administrator) using these two commands:
C:\Windows\system32>cd \windows\system32\inetsrv
C:\Windows\System32\inetsrv>appcmd set site /site.name:"<THESITENAME>" /+bindings.[protocol='https',bindingInformation='<MYIPADDRESS>:443:<WANTEDHOSTNAME>']
change the "<THESITENAME>", "<MYIPADDRESS>", "<WANTEDHOSTNAME>" to approprate value's.
Verify
If you want to verify that the certificate is there, open certmgr.msc

Hope it helped 
UPDATE:
If you want to add the certificate to an existing site, you might want to find out the APP id using :
netsh http show sslcert
so that you can add the certificate manually to the existing website (you can find the cert hash using the "server certificates" in IIS)
netsh http add sslcert ipport=0.0.0.0:443 certhash=baf9926b466e8565217b5e6287c97973dcd54874 appid={ab3c58f7-8316-42e3-bc6e-771d4ce4b201}